|
It's not uncommon for carpets to smell after they've been cleaned. There are a few reasons why this might happen. This is a very unpleasant sign, and it should be rectified as soon as possible, as it can indicate an underlying health issue. If your carpets smell bad after you clean them, don't worry; we're here to help. We'll provide some tips on how to get rid of the smell and make your carpets smell fresh again. Follow our suggestions to get rid of odors and enjoy fresh-smelling carpets once again. What Are The Possible Reasons Why My Carpets Smell After Cleaning Them?
One of the most frustrating things that can happen after taking the time to clean your carpets is for them to stink worse than before. There are a few possible causes for this. Below are some of the most common culprits: 1. Improper Cleaning Techniques:If you don't use the right cleaning techniques when vacuuming or steam-cleaning your carpets, residue can be left behind, which can cause a sour smell. Be sure to read up on the best carpet cleaning methods and use appropriate products. 2. Mold and Mildew:If the area is damp or humid, mold and mildew can start to form in the carpet padding. This will create a musty smell that can be difficult to eliminate without professional help. RELATED ARTICLE: How to Clean a Brick Floor 3. Pet Accidents:Sadly, pets are often the common cause of bad smells after cleaning carpets. If your pet has had an accident on the carpet, it's important to clean it up as quickly as possible to prevent odors from setting in. 4. Spills and Stains:Food and drink spills may seem harmless at first, but if they aren't cleaned up properly, they can cause a lingering odor even after you vacuum or steam-clean your carpets. 5. Poor Ventilation:Lack of ventilation can cause odors to become trapped in carpets and fabrics. Make sure your home is properly ventilated to prevent this from happening. It can help to open windows or run fans in the area. ALSO READ: How to Clean Treadmill Belt If you notice that your carpets smell worse after cleaning them, it's important to identify the source of the odor and take the necessary steps to remove it. Following proper carpet care techniques can help prevent odors from occurring in the first place. What Can You Do To Get Rid Of The Smell?If you've determined what's causing the bad smell and taken action to remedy it, there are still a few more things you can do to eliminate any lingering odors. These include: 1. Using an Odor Eliminator:There are many commercial products available that are designed to neutralize odors in carpets. Choose one that's specifically formulated for your type of carpeting. Follow the instructions on the label for the best results. 2. Adding Baking Soda to Your Vacuum Cleaner Bag:Sprinkle some baking soda into the vacuum cleaner bag before you start cleaning. This will help absorb any odors that are stuck in your carpet fibers as you suck them up. Make sure to empty out the bag and replace it with fresh baking soda between each pass over the carpet. 3. Using a Deodorizer:Deodorizers come in various forms, including sprays, powders, and air fresheners. Spray or sprinkle one of these products onto your carpets and let it sit for several hours to help eliminate odors trapped in the fibers of your carpeting. Take a look at the label to determine if the product is safe for use on your specific type of carpeting. By taking these steps, you can help reduce lingering odors in your carpets and make them smell fresh again! With a little effort, you'll have your carpets smelling as good as new in no time. Final ThoughtsAfter understanding why your carpets smell after cleaning, you can take steps to prevent future occurrences. Make sure to use the right kind of detergent and vacuum regularly. Avoid using overly-strong solutions or solutions that contain harsh chemicals, as these can leave behind a residue that will cause an unpleasant odor. Additionally, be sure to let your carpets dry thoroughly after every clean, as this helps get rid of residual moisture, which can also lead to odors. By following all the steps above, you can keep your carpets smelling fresh for longer and enjoy the clean air in your home.
0 Comments
11/23/2022 1 Comment How to Clean a Brick Floor
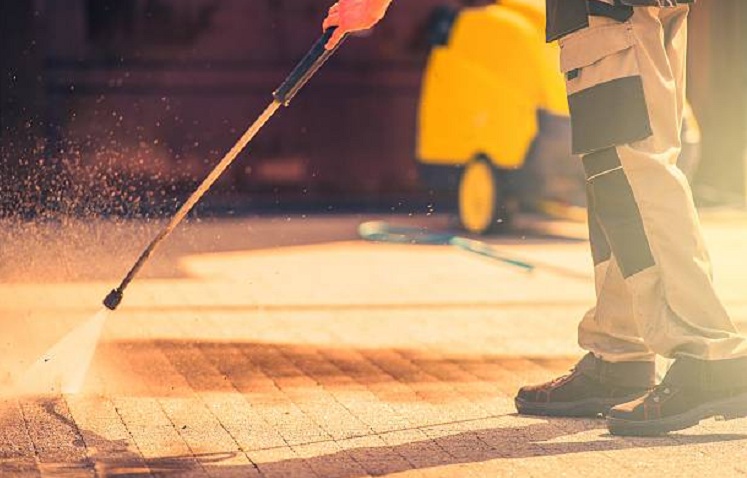
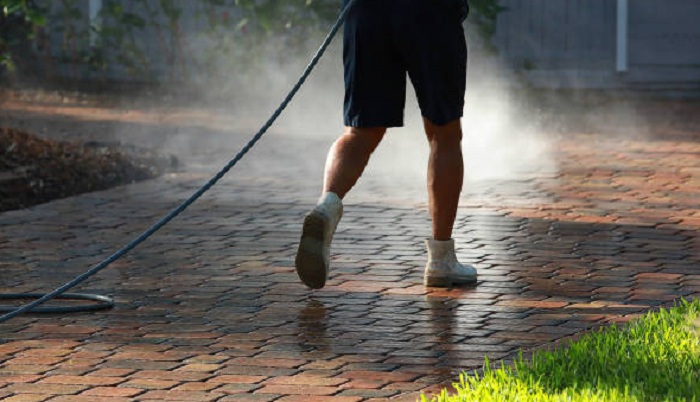
Brick floors are beautiful, but they can be a lot of work to keep clean. If you don't know how to clean a brick floor, it can be difficult to get the dirt and grime off. You might even end up damaging your floor in the process. Not only is it hard to know where to start when cleaning a brick floor, but using the wrong methods or products can actually damage the bricks. Also read how to remove sliding windows for cleaning easily. We're here to help. With our easy guide, you'll be able to clean your brick floor quickly and easily without any damage. Follow these simple steps, and your floor will look good as new in no time. How to Clean a Brick Floor: The Basics
If you’re looking for an easy way to spruce up your brick floor, the best place to start is with the basics. The maintenance of a brick floor is not only important for appearance but also helps maintain its durability and longevity. Here are some tips to keep your brick floors clean: Step 1: Vacuum or SweepBefore you start any deep cleaning, it’s important to remove any dirt and dust that may be present. Vacuuming or sweeping your brick floor is the best way to do this. For a deep clean, you can use a vacuum with a brush attachment to remove any tough stains or dirt. Step 2: Mop the FloorOnce all of the debris is removed, you can then mop the floor with a damp mop. Be sure to use a gentle cleaner, like mild dish soap or white vinegar, as harsh chemicals can damage the brick. If there are any tough stains, you may need to use a scrub brush to help remove them. It’s important to use a moderate amount of water when mopping, as too much can cause the brick to crack. Step 3: Rinse With WaterAfter you have mopped the floor, it is important to rinse with clean water to remove any residue from the cleaning solution and debris. To do this, simply use a clean, damp mop or cloth and gently rinse the floor. If you have grout lines, be sure to focus on those areas as well. Step 4: Dry the FloorOnce you have rinsed your floor, make sure to dry it thoroughly before walking on it or applying any sealers or polishers. This can be done with a clean cloth or mop, making sure to get in all of the nooks and crannies. RELATED ARTICLE: How to Clean Treadmill Belt Following these steps will help keep your brick floor looking clean and fresh as long as it lasts. Don’t forget to seal your brick floor every few years to ensure its longevity. With some simple cleaning and maintenance, you can enjoy your brick floors for many years. How to Protect Your Brick Floor from Scratches and StainsYour brick floor can easily be scratched and dented if you do not take the necessary steps to protect it. To keep your floors looking pristine, here are a few tips that should help: 1. Avoid wearing high heels or hard-soled shoes when walking on the brick. 2. Place rugs and mats in entryways, hallways, and other areas with frequent foot traffic. 3. Use a protective sealant to reduce the number of particles that accumulate on the floor. 4. Place furniture protectors on the bottom of any heavy pieces that could cause dents or scratches. 5. Move furniture by lifting it rather than dragging it across the floor. 6. Use a gentle cleaning solution and soft mop for periodic maintenance cleanings. 7. Wipe up spills as soon as possible with a damp cloth. By following these simple tips, you can help brick floors remain to look beautiful for years to come. Final ThoughtA clean and well-maintained brick floor adds great aesthetic value to any home. With the proper cleaning techniques, you can easily avoid fading brick floors looking good for years. Start by preparing your tools, and then begin vacuuming the floor to remove dirt and dust particles. Next, use a mop or cloth to wipe down the floor's surface in a circular motion. Finally, apply a sealant to protect the surface from further damage. Following these steps regularly will ensure that your brick floor looks beautiful and lasts for many years.
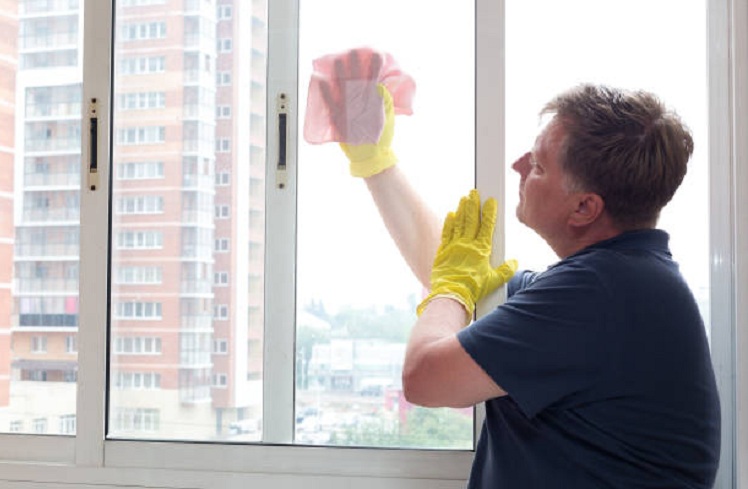
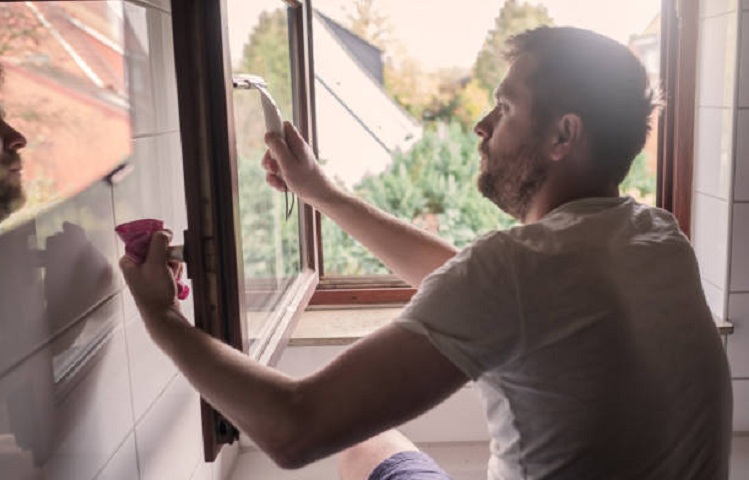
Cleaning your windows can be a hassle, but with our guide, it doesn't have to be. Sliding windows are a popular choice for many homeowners because they're easy to open and provide plenty of ventilation. However, they can also be challenging to clean. That's why we've put together this guide on removing sliding windows for cleaning. Follow our simple steps, and you'll be able to clean your sliding windows in no time! Not only will your home look cleaner, but you'll also feel more productive knowing that you took the time to do it yourself. Why It's Important To Clean Your Windows?Clean windows are important for several reasons. First, they let in more light, making your home or office brighter and more cheerful. Second, they provide a clear view of the outside, which can be important for safety. Third, clean windows make it easier to spot any problems with your roof or the paint on your house. Fourth, clean windows can help to improve your home's energy efficiency by allowing more sunlight in and keeping heat from escaping. Finally, clean windows just look better. RELATED ARTICLE: How to Clean Treadmill Belt A clean window is a sign of a well-cared-for home, and it can make a big difference in how your home looks to guests and passersby. So pay attention to your windows - give them a good cleaning today. The Best Way to Clean Sliding Windows
There is no doubt that sliding windows are a popular option for homes and offices because they allow natural light to enter the room and let in the outdoors. However, sliding windows can be tough to clean, as dirt and debris can quickly accumulate in the tracks. Here are some of the best methods for cleaning your sliding windows: One of the best ways of cleaning sliding windows is with a damp microfiber cloth. Start by dusting the window to remove any loose debris. Then, wet your cloth and wring it out, so it’s only slightly damp. Gently wipe the window in a back-and-forth motion until it’s clean. ALSO READ: How to Prepare For Air Duct Cleaning You can also use a window cleaner or vinegar solution for window cleaning. For tougher stains, you may need to use a scrub brush. Be sure to rinse the window afterward to remove any leftover cleaning solution. Another method for cleaning sliding windows is to vacuum them with a handheld vacuum cleaner. This is a great option for removing pet hair and debris from the windows. To vacuum your windows, start at the top and work your way down. Be sure to move slowly so that you don’t miss any spots. It is also possible to use the brush attachment on your vacuum cleaner to reach tight corners and crevices. Whichever method you choose, be sure to clean both the inside and outside of your sliding windows for the best results. Regular cleaning will help keep your windows looking new for years to come. Tips for Keeping Your Windows Clean In The FutureOnce you have cleaned your windows, there are a few things you can do to make sure they stay clean. Below are some tips for keeping your sliding windows spotless: 1. Regularly inspect the window tracks and clean them with warm water and soap. This will help remove any dirt, dust, or debris that may have accumulated over time. 2. Use a vacuum cleaner to suck up dust and pet hair from the window sill and frame. This should be done at least twice a year. 3. Apply lubricant to the tracks and runners of your windows, as this will keep them running smoothly. 4. Remove any cobwebs or wasp nests around your windows and in the window tracks. This is important, as these can cause problems with opening and closing the window. 5. Check the caulking or weather-stripping around your windows, as these can wear out over time. Applying a fresh coat of caulk or replacing old weather-stripping will help keep air and water from entering through any gaps. By following these tips, you can ensure that your sliding windows remain spotless and functioning properly a long time. If you have any problems or questions, don’t hesitate to contact a professional window cleaner. They can help ensure that your windows are in optimal condition so that you can enjoy the fresh air and great views easily. Final ThoughtNow that you understand how to take off sliding windows for cleaning, it's important to remember that this is best done with the help of a professional. If you are not careful and knowledgeable about the job, you could end up damaging your window or causing more harm than good. It is always the safest option to hire someone who has experience dealing with these types of jobs. Keep in mind that if you are ever unsure of something, it is always best to ask for help or seek out the advice of a professional. Hope this guide helps you take off sliding windows with ease. Good luck. 11/20/2022 8 Comments How to Prepare For Air Duct Cleaning
It's important to keep your air ducts clean, but it can be tough to know where to start. Not only is it difficult to know how to prepare for air duct cleaning, but many people don't even realize that their ducts need cleaning first. You are in luck, as there are some simple steps you can take to get ready for air duct cleaning. We are experts in air duct cleaning, and we will guide you through every step of the process. We will also help you assess whether you need to clean your ducts so that you can rest easy knowing that your home is healthy and safe. How to Determine Whether Or Not Your Ducts Need Cleaning
One of the most important steps in preparing for air duct cleaning is determining if it is even necessary. While a professional can help you with this assessment, there are some signs that owners and homeowners should look out for: 1. Check your vents and registers. If they contain an excessive amount of dust and debris or have visible mold and mildew growth, it is likely time for an air duct cleaning. 2. Inspect around the edges of the vents and registers to see if there are any signs of pests or rodents that have been living in the ductwork. 3. If you notice a musty odor coming from your vents, this could signify mold or mildew growth. If so, it is important to address this quickly before the situation worsens. 4. Your energy bills are often a good indicator of when you should get your air ducts cleaned. An increase in energy usage could be due to dust and dirt buildup that is reducing the efficiency of your HVAC system These are just some signs that indicate it may be time to clean your air ducts. It is always best to consult with a professional before making any decisions. They will be able to assess your system and help you determine if the cleaning of your air ducts is necessary and advice on what type of service would best suit your needs. By doing so, you can ensure that your home remains comfortable and safe for your family. How to Prepare For Air Duct CleaningOnce you have determined that you need your ducts cleaned, it is time to start preparing for the service. Here are some steps to get you ready for a successful air duct cleaning: Step 1: Declutter the Area: Before your technician arrives, declutter the room or space they will be entering. Clear away furniture, rugs, and any other obstacles that may get in their way. Step 2: Cover Furniture: If you have furniture or fragile items in the area of the air duct being cleaned, cover them with a sheet or drop cloth to avoid unintentional damage from dust or dirt. Step 3: Remove Hanging Items: Take down any pictures or decorations from walls near where your technician will be working. This will make it easier for them to access all areas of your duct system and also help protect them from accidental damage. Step 4: Turn Off Air Conditioning: Make sure you turn off any air conditioning system that is connected to the ducts in advance. This will ensure that there is no chance of dust or dirt blowing into other parts of your home. Step 5: Vacuum: Even though your air duct cleaning professional will clean the area thoroughly, it is still a good idea to vacuum any areas near where they will be working beforehand, just in case any dust or dirt has been tracked in from outside. This extra step can help reduce how much time and effort your technician needs to spend on the job. Step 6: Open Doors and Windows: If possible, open some doors and windows for ventilation when the technician arrives so that dirt and dust particles can escape more easily. Step 7: Clear Pets Out of the Way: If you have any pets, make sure to keep them away from the area and out of your technician's way. This will allow them to work safely and efficiently without any distractions. Step 8: Have Your Questions Ready: Before the technician arrives, write down any questions you may have so that they can be answered quickly when they arrive. Following these steps will help ensure that the duct cleaning service is as successful as possible. Preparing ahead of time will also help save time and energy on the day of the appointment, allowing for a more efficient job.
Once all preparations are made, it’s time to sit back and relax; your air ducts are about to get a much-needed deep clean. ConclusionAir duct cleaning is an important part of any homeowner’s regular maintenance routine. It helps keep your home clean, healthy, and energy-efficient. Before beginning the cleaning process, it’s important to take some simple steps to prepare your air ducts. Be sure to check local regulations and find a reputable air duct cleaner in your area to help get the job done right. Proper preparation will ensure that it is done safely, correctly, and with minimal disruption to your family. With a little bit of effort, air duct cleaning can help you maintain a clean and healthy home for years to come. |